DIY picture hanging – your go‑to guide for flawless wall art
When working with DIY picture hanging, the process of mounting photos, artwork and décor on your walls without hiring a professional. Also known as home picture mounting, it blends simple measurement skills with the right hardware. Essential tools include picture hooks, small metal or plastic fittings that grip the back of a frame, a stud finder, a device that locates wall studs for heavier pieces, and a level to keep everything straight. Understanding how these pieces fit together makes DIY picture hanging easy, safe, and budget‑friendly.
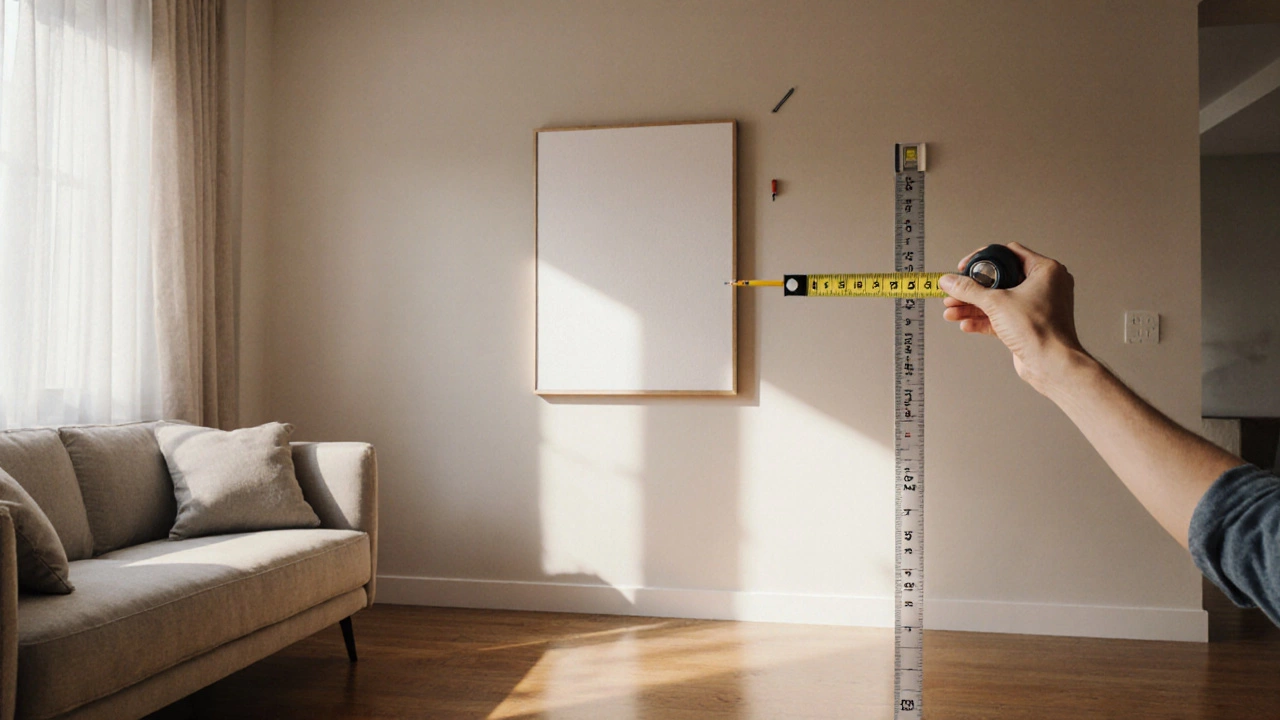
The first step is to decide where your wall art, the visual centerpiece you want to display will live. Measure the wall space, mark the center, and use a pencil to note nail locations. A good rule of thumb is to hang art at eye level – about 57 to 60 inches from the floor – but adjust for ceiling height and furniture. Next, evaluate the weight of each piece. Light frames (under 5 lb) can use simple adhesive strips, while medium‑weight items (5‑20 lb) need screw‑in picture hooks. Heavy artwork over 20 lb should be anchored into a stud; that’s where the stud finder becomes indispensable. Choose hooks with a load rating that matches or exceeds your frame’s weight, because the right hook directly influences the wall’s load capacity.
Step‑by‑step process for a secure, stylish result
Start by gathering a tape measure, pencil, level, hammer, and the appropriate hooks. If you’re dealing with drywall, pre‑drill a pilot hole for the screw to avoid cracking the surface. For plaster or brick, use a masonry bit and wall anchors. After inserting the hook, double‑check its stability by giving it a gentle tug. Align the frame with the hook, use a small piece of masking tape as a temporary guide, then hang the piece and step back to assess. Use the level to ensure the top edge is perfectly horizontal; a quick visual check can save you from uneven gaps. If you notice any wobble, tighten the screw or shift the hook a millimeter and re‑level. Finally, step away, admire the placement, and adjust as needed – a slight shift can dramatically improve the room’s visual balance.
By mastering these basics, you’ll be able to hang anything from a single family photo to a large gallery wall without second‑guessing yourself. The articles below dive deeper into specific topics like avoiding common placement mistakes, choosing the right hardware for different wall types, and creative ways to arrange multiple frames. Armed with the right tools and a clear process, you’re ready to turn any blank wall into a personalized showcase.
Picture Hanging Rules: How to Hang Art at the Perfect Height
Learn the essential picture hanging rule, how to measure for perfect height, choose hardware, and avoid common mistakes for flawless wall art placement.
Continue Reading