Picture Hanging Height: Find the Sweet Spot for Every Piece
When planning picture hanging height, the vertical distance from the floor to the center of a framed piece. Also known as art placement height, it helps create visual comfort and keeps artwork at eye level for most viewers. This concept ties directly to wall art placement, which covers how you arrange multiple works on a single wall. Understanding the height rule is the first step toward a balanced, professional‑looking display.
Why Height Matters More Than Size
Picture hanging height isn’t about the dimensions of the frame; it’s about how the human eye perceives space. A piece hung too high pulls the eye upward, making a room feel distant, while a low placement forces viewers to bend and can clash with furniture lines. The rule of thumb—center of the artwork around 57‑60 inches from the floor—creates a visual anchor that works in living rooms, hallways, and offices. This simple measurement aligns with picture hanging height standards and ensures the art stays in the viewer’s natural line of sight, regardless of ceiling height.
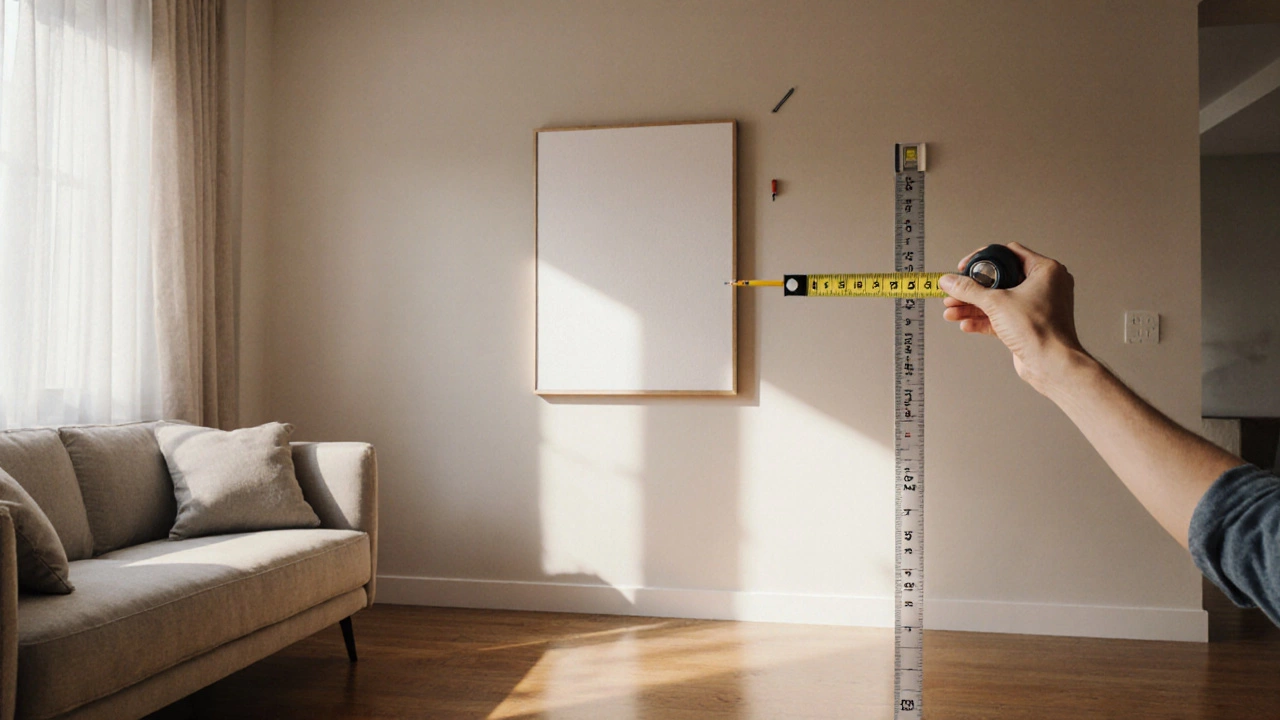
Applying the height rule becomes easier when you use the right picture hanging tools. A steel measuring tape, a small level, and a set of picture hooks calibrated for the frame’s weight are all you need. Start by measuring from the floor to your eye level, mark that spot with a pencil, then subtract half the frame’s height to find the exact center point. A quick level check guarantees the piece won’t tilt, preserving the clean, professional look you’re after.
Lighting plays a silent but powerful role in how height is perceived. Room lighting that shines from above can make a high‑hung picture appear even higher, while side lighting softens shadows and helps the artwork blend with surrounding elements. Position floor lamps or wall sconces at or slightly below eye level to draw attention back toward the piece, reinforcing the intended hanging height. Adjusting light angles is a low‑cost tweak that can correct a height that feels off.
Many people try to create a gallery wall without a clear height plan, leading to a chaotic look. When building a gallery wall, treat the entire arrangement as one large piece and apply the same hanging height rule to its collective center. This approach keeps the overall composition grounded while allowing individual frames to vary in size. Start with the largest frame, set its center at the standard height, then arrange smaller pieces around it, maintaining consistent spacing.
Measuring from furniture can also guide you. The top edge of a sofa or console often sits about 30‑36 inches above the floor; aligning the art’s bottom edge with this line creates a visual connection between the artwork and the furniture. If the room features a high ceiling, you can add a slight lift—up to 6 inches—above the standard height to fill the vertical space without overwhelming the view. Just remember that any deviation should feel intentional, not accidental.
Now that you know how picture hanging height interacts with placement, tools, lighting, and gallery arrangements, you’re ready to move from theory to practice. Below you’ll find a curated list of articles that dive deeper into each of these aspects, offering step‑by‑step guides, common pitfalls, and creative ideas to help you hang your art like a pro.
Picture Hanging Rules: How to Hang Art at the Perfect Height
Learn the essential picture hanging rule, how to measure for perfect height, choose hardware, and avoid common mistakes for flawless wall art placement.
Continue Reading