Easy Ways to Decorate a Room Wall with Simple Items
Wall Decoration Planner
Select Items to Add
Frame
Fairy Lights
Tapestry
Floating Shelf
Plant Pot
Mirror
Preview Your Wall
Click on items to add them to your wall preview. Drag to adjust positions.
Selected Items
No items selected yet. Click on items to add them to your wall.
Planning Tips
- Plan your layout on the floor first
- Mix textures (wood, metal, fabric) for depth
- Balance base, feature, and accent layers
- Keep a simple checklist of tools
Quick Takeaways
- Use everyday objects-frames, lights, plants-to create visual interest without a big budget.
- Plan your layout on the floor first; it saves wasted holes and mismatched spacing.
- Mix textures (wood, metal, fabric) for depth; a single colour can still feel dynamic.
- Layering is cheap: combine a hanging tapestry with a small shelf for books or succulents.
- Keep a simple checklist of tools (hammer, level, command strips) to stay organized.
Want a fresh look but don’t want to splurge on custom art? You can transform any wall with items you already own or can pick up for a few pounds. Below you’ll find a step‑by‑step guide, a handy checklist, and real‑world examples that prove a striking wall doesn’t need a professional mural.
Core Elements of a Simple Wall Makeover
Before you start buying, think of the wall as a canvas made of three layers:
- Base layer - the paint or wallpaper you start with.
- Feature layer - the focal piece (a large frame, tapestry, or stencil).
- Accent layer - smaller items that add personality (lights, plants, wall‑mounted shelves).
Balancing these layers means you can keep costs low while still achieving a cohesive look.
Key DIY Items and How to Use Them
Each of the following items works well on its own, but they shine when combined.
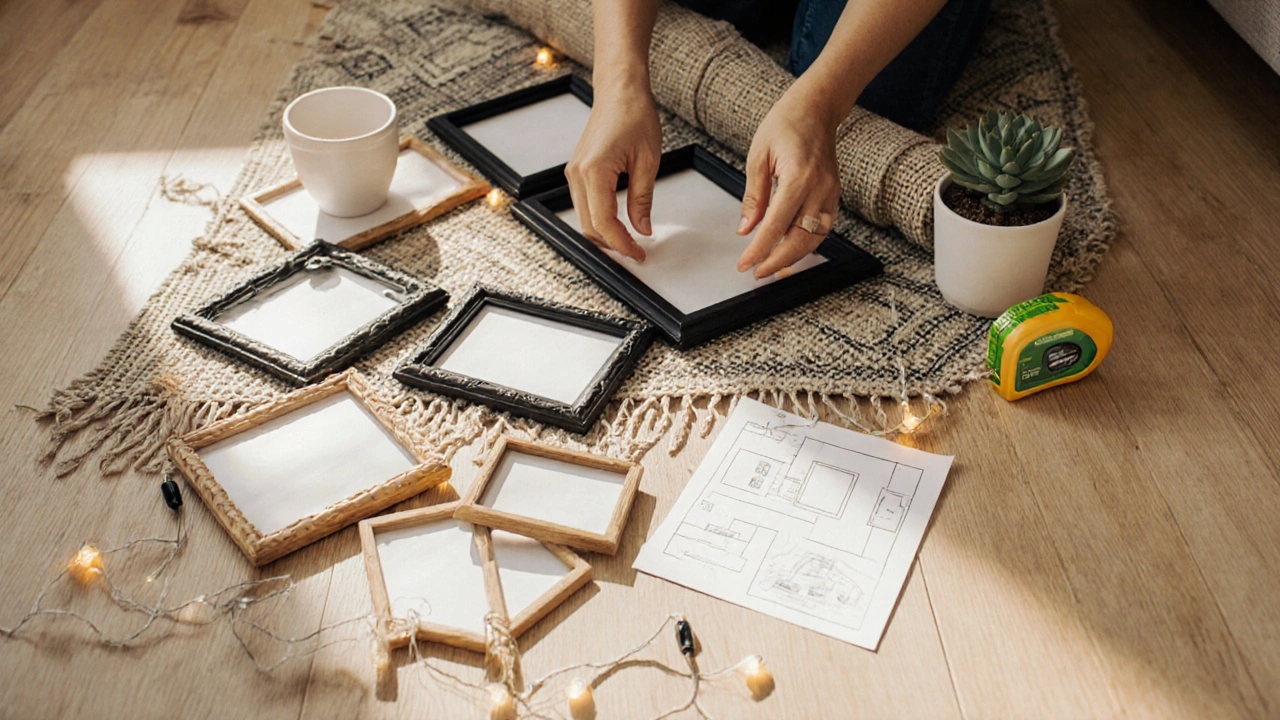
Picture frames are a classic way to create a gallery wall. Choose frames in matching finishes for a tidy feel, or mix colours for an eclectic vibe. Use a cheap 8×10 frame for a poster, a larger 16×20 for a family photo, and a couple of 5×7 for inspiration quotes.
Wall stencils give the illusion of hand‑painted patterns without the skill. Pick a geometric or floral design, tape the stencil to the wall, and use a small roller to apply paint. One‑coat finishes work best for living‑room walls that already have a bold colour.
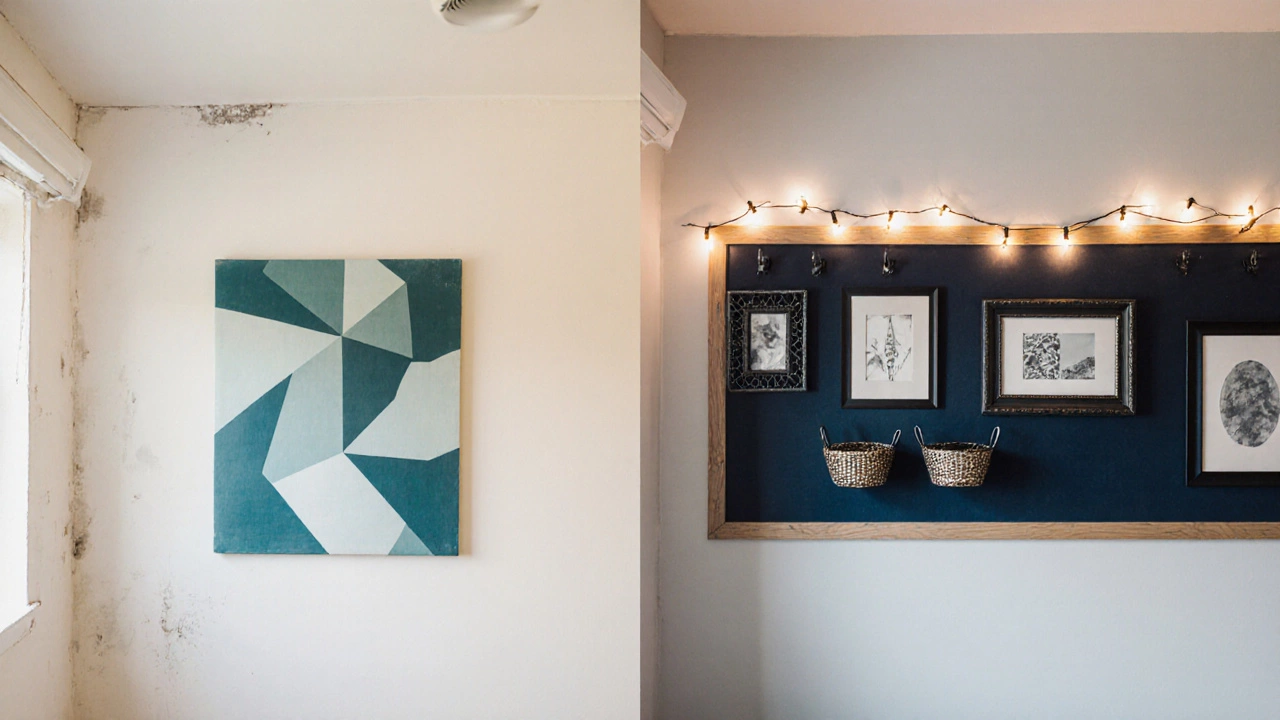
Fairy lights add warmth and can be arranged in a linear fashion, draped across a canvas, or wrapped around a hanging shelf. LED strips are energy‑efficient and come with adhesive backs-no drilling required.
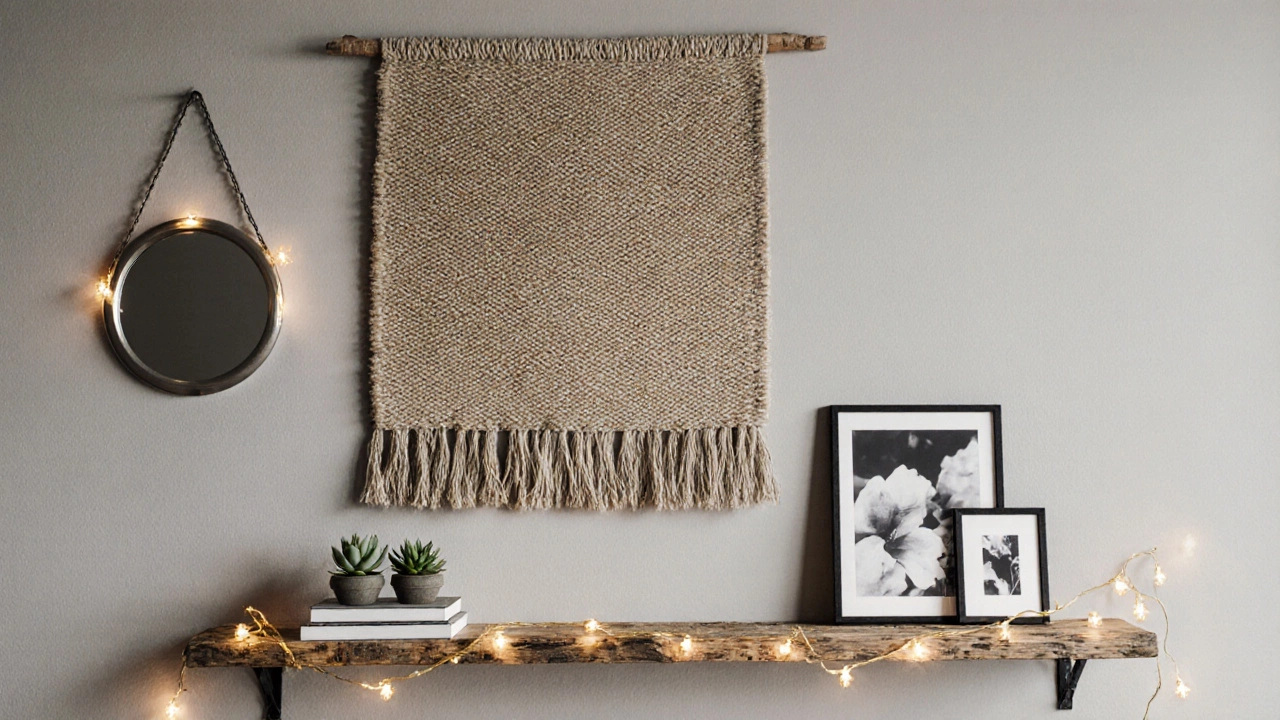
Woven tapestry provides instant texture. Hang a 2‑meter‑wide piece with two command strips, and you’ve got a feature layer that also softens a hard wall.
Floating shelf serves as both storage and display. A single narrow shelf can hold a row of succulents, a small stack of books, or a line of framed prints.
Wall‑mounted plant pot brings life indoors. Choose a lightweight ceramic or a metal hanging pot; attach with a simple screw or a sturdy adhesive hook.
Canvas print offers a custom art feel without commissioning an artist. Upload a personal photo or download a royalty‑free design, print on canvas, and stretch over a wooden frame.
Mirror can visually enlarge a small room. A round mirror placed at eye level doubles light bounce and adds a decorative edge.
Pegboard is a versatile backdrop for hooks, baskets, and small frames. Paint it a bold colour for a pop‑up effect.
Budget Comparison of Simple Wall Items
| Item | Average Cost (GBP) | Installation Effort | Style Flexibility |
|---|---|---|---|
| Picture frame | £5‑£20 each | Low - hang with nail or command strip | High - swap prints anytime |
| Wall stencil | £8‑£15 per sheet | Medium - tape, paint, remove | Medium - permanent pattern |
| Fairy lights | £10‑£25 per set | Low - adhesive or plug‑in | High - can be repositioned |
| Woven tapestry | £12‑£30 | Low - command strips | Medium - limited colours |
| Floating shelf | £8‑£22 per meter | Medium - drill or wall anchors | High - display anything |
| Wall‑mounted plant pot | £6‑£15 | Low - hook or screw | Medium - adds greenery only |
| Canvas print | £15‑£40 | Low - stretch over frame | High - interchangeable art |
| Mirror | £10‑£35 | Low - secure with brackets | Medium - functional decor |
| Pegboard | £12‑£25 per sheet | Medium - mount with screws | High - adapt hooks, baskets |
Step‑by‑Step Wall Transformation
Follow this roadmap to avoid the dreaded ‘too many holes’ problem and keep your design cohesive.
- Define the purpose. Is the wall a photo showcase, a reading nook backdrop, or a mood‑setter? Write the goal on a sticky note.
- Measure and sketch. Use a tape measure, note height and width, then draw a quick layout on paper. Mark where each item will sit.
- Gather your items. Pull together frames, lights, shelves, etc., and lay them on the floor to test the arrangement.
- Start with the base. If the wall is plain white, consider a light wash of paint or a subtle wallpaper. Let it dry fully before adding items.
- Hang the focal piece. This could be a large canvas, a tapestry, or a bold stencil. Position it at eye level (about 150cm from floor).
- Add accent pieces. Work outward from the focal point: place a floating shelf below a canvas, then drape fairy lights across the top.
- Level everything. Use a small spirit level or a smartphone app to ensure frames are straight. Small misalignments look messy.
- Finish with personal touches. Swap a photo, rotate a plant, or change the light colour to keep the wall feeling fresh.
Common Pitfalls and How to Avoid Them
- Over‑crowding. Less is often more. Stick to 2‑3 main elements and fill gaps with smaller accents.
- Wrong height. Anything above 180cm feels too high for casual viewing. Keep most décor below that line.
- Uneven spacing. Use a ruler or a 5‑cent coin as a spacer to keep gaps uniform.
- Heavy items without support. A 5‑kg canvas needs wall anchors; a lightweight frame can go on a nail.
- Ignoring colour harmony. Pick a base colour (e.g., soft gray) and let all items pull from that palette.
Mini‑FAQ
Can I hang a gallery wall without drilling?
Yes. Heavy‑duty command strips hold frames up to 2kg each. For larger pieces, a small “push‑pin” with a ruler works well on plaster.
What’s the best paint finish for a wall that will host stickers and tapes?
A matte or low‑sheen finish lets adhesive stick without glossy glare, and it’s easy to touch up later.
How do I keep fairy lights from sagging over time?
Attach small, invisible hooks (e.g., push‑pin nails) every 30cm along the line. This distributes the weight evenly.
Is it okay to mix wood and metal frames on the same wall?
Mixing textures adds visual interest. Keep the colour palette similar-e.g., natural wood + black metal-so the mix feels intentional.
What’s a quick way to test a colour scheme before painting?
Paint a 30cm×30cm swatch on cardboard, place it beside your décor, and view it at different times of day. If it works, paint the whole wall.
Next Steps & Troubleshooting
If the wall looks too busy, strip back to the focal piece and re‑evaluate spacing. When a nail leaves a hole, fill it with a small amount of spackle and sand smooth before repainting. For rooms with high humidity (like bathrooms), opt for waterproof adhesive strips and mold‑resistant frames.
Ready to give your wall a makeover? Grab a tape measure, a few inexpensive frames, and start arranging on the floor. The transformation will surprise you, and the cost stays under £100 for most rooms.